 Sign up with Google
 Sign in with Zoho


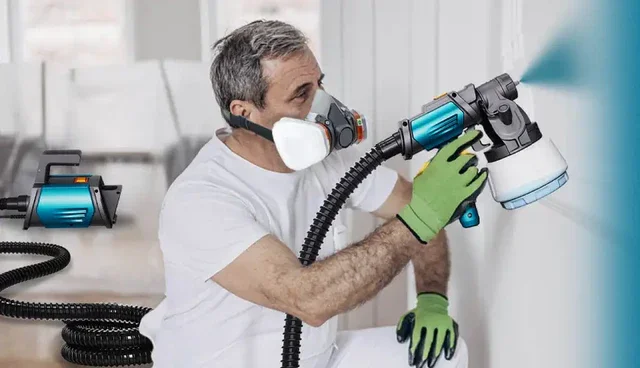
Painting a room, a fence, or a piece of furniture usually starts with a trip to the hardware store. You stand in the aisle, looking at rollers, brushes, and trays. You remember the last time you used a roller—the aching wrist, the missed corners, the thin spots that required a second coat. There is a better way. A cordless paint sprayer removes the fatigue and the tedium. It applies paint faster and more evenly than any hand tool.
Beginners often hesitate. They see a sprayer and imagine a sticky mess, drips running down the wall, and paint covering every surface in the room. The truth is simpler. A modern cordless paint sprayer is designed for ease of use. With the right preparation and a few basic techniques, anyone can achieve a finish that looks like a professional did the work.
Why a Cordless Paint Sprayer Changes the Project
The main advantage of a cordless paint sprayer is speed. A roller covers a wall in passes. A sprayer covers the same wall in a continuous stream. You move your arm in straight lines, and the paint lands evenly. There are no lap marks, no roller texture, no splatter.
The freedom of movement is another factor. No cord means you are not tethered to an outlet. You can walk around a room, climb a ladder, or paint a fence without dragging a heavy extension cord behind you. The battery does the work. You focus on the spray pattern.
The Preparation That Guarantees a Flawless Finish
The single biggest mistake beginners make is skipping the setup. They fill the cup, point the gun, and pull the trigger. The result is a mess. Preparation is the secret to success.
1. Thin the paint correctly
A Cordless Paint Sprayer works best with a specific viscosity. Latex paint straight from the can is too thick. It creates spitting, clogging, and an uneven orange-peel texture. Pour your paint into a mixing bucket. Add a small amount of water—roughly five to ten percent of the volume. Stir thoroughly. Use a viscosity cup to test the flow. The paint should run through the cup in a smooth, steady stream. If it hangs or drips, add more water.
2. Strain the Paint
Even a well-mixed can of paint contains tiny lumps or dried bits. These particles will clog the nozzle of your sprayer. Pour the thinned paint through a fine-mesh paint strainer or a nylon stocking directly into the sprayer cup. This step takes thirty seconds and prevents fifteen minutes of frustration.
3. Mask Everything
Sprayers are efficient. They also produce overspray—a fine mist that drifts into the air. Tape plastic sheeting over the floors, furniture, windows, and door frames. Use painter’s tape on the edges of trim and ceilings. Do not skip this step. The time you save by spraying will be lost if you have to scrub paint off a window.
The Technique for a Smooth Application
You hold the sprayer in your hand. The paint is ready. The room is masked. Now you need to move correctly.
Maintain the Correct Distance
Hold the nozzle six to eight inches from the surface. If you hold it closer, the paint will pool and run. If you hold it farther, the paint will dry before it hits the wall, creating a rough texture. Keep your arm steady. Let the sprayer do the work.
Keep the Gun Moving
Never stop the sprayer while pointing it at the wall. This is the most common beginner error. You pause, and paint builds up in one spot. That spot becomes a drip. Start the sprayer slightly off the edge of the wall. Sweep your arm across in a straight line. Release the trigger just past the opposite edge. This technique is called “triggering on the fly.” It prevents heavy paint buildup at the start and end of each pass.
Overlap Each Pass by Fifty Percent When you are painting a ceiling with a roller, you overlap the edges. The same rule applies to a sprayer. Each pass should overlap the previous pass by about half. This ensures even coverage. There are no thin stripes between the rows of paint.
Work in Sections
The battery on a cordless paint sprayer lasts for a specific amount of time. The paint in the cup also has a limited volume. Work in logical sections. Paint the trim first. Then paint the ceiling. Finally, paint the walls. This order allows you to keep moving without stopping to refill or recharge.
The Cleaning Process That Extends the Life of Your Sprayer
A cordless paint sprayer is a tool. Like any tool, it requires maintenance. The number one reason sprayers fail is leftover paint hardening inside the nozzle or the tube.
Flush Immediately
When you finish painting, do not wait. Remove the battery. Empty any remaining paint back into the can. Fill the cup with warm water for latex paint, or mineral spirits for oil-based paint. Reattach the cup. Turn the sprayer on and spray the water through the system until it runs clear. This flushes the paint out of the nozzle and the hose.
Clean the Nozzle and Filter
Unscrew the nozzle. Soak it in a small container of water or solvent. Use the small cleaning brush that came with the sprayer to scrub the inside of the nozzle. Remove the filter from the cup. Rinse it under running water. Any paint trapped in the filter will dry into a hard plug that blocks the next project.
Dry and Store
Wipe the exterior of the sprayer with a damp cloth. Shake off any excess water from the nozzle and filter. Let all the parts air dry completely before reassembling. Store the sprayer in a clean, dry place. A sprayer stored with water inside will develop rust or mold.
Common Mistakes and How to Avoid Them
Beginners often make the same three errors. Knowing them in advance saves time and paint.
The Drip Issue
A drip happens when the paint is too thick, the nozzle is too close to the surface, or the sweep is too slow. If you see a drip forming, stop immediately. Spread the drip with a clean brush or your finger. Do not try to spray over it. That will make the drip worse.
The Orange Peel Texture
If the paint dries with a rough, bumpy surface, the paint is too thick, or the nozzle is too far from the wall. Adjust the viscosity of the paint or bring the gun closer to the surface.
The Clog
A clog happens when paint dries inside the nozzle during a break. If you stop for more than five minutes, rinse the nozzle with water. Better yet, plan your work so you can finish a section without stopping.
Why the Tilswall Hornet Cordless Paint Sprayer Is the Right Choice for Beginners
You have read the technique. You know the steps. Now you need a tool that makes those steps easy. The Tilswall Hornet Cordless Paint Sprayer is designed specifically for the user who wants a professional result without the complexity of a high-end professional rig.
The Hornet uses a powerful copper motor that delivers consistent pressure. It has a 20V battery that provides enough runtime to paint an entire room on a single charge. The battery is interchangeable with other Tilswall tools, which reduces the number of chargers you need to keep around.
The key feature for a beginner is the adjustable flow control. You can dial in the paint volume based on the thickness of your paint and the surface you are covering. The nozzle is a three-position design. You can rotate it for horizontal, vertical, or circular spray patterns. This means you do not have to tilt your wrist to paint a chair leg or a window frame. You simply rotate the nozzle.
The Hornet also has a built-in viscosity cup. You pour your thinned paint into the cup, and the tool tells you if the consistency is correct. There is no guesswork. The cleaning process is straightforward. The cup and nozzle detach easily for rinsing under a faucet.
The price point is accessible. The Tilswall Hornet falls into the mid-range category, which means you are getting a durable tool with a solid warranty, but you are not paying for features you will never use. It is a tool that works the first time, every time, as long as you follow the preparation steps outlined in this guide.
A cordless paint sprayer is not a magic wand. It is a tool that requires respect for the process. The prep work takes time. The technique takes practice. The cleaning takes patience. The reward is a wall, a fence, or a cabinet that looks like it was painted by a professional. The finish is smooth, even, and free of brush marks. The job takes half the time. And you did it yourself.