 Sign up with Google
 Sign in with Zoho
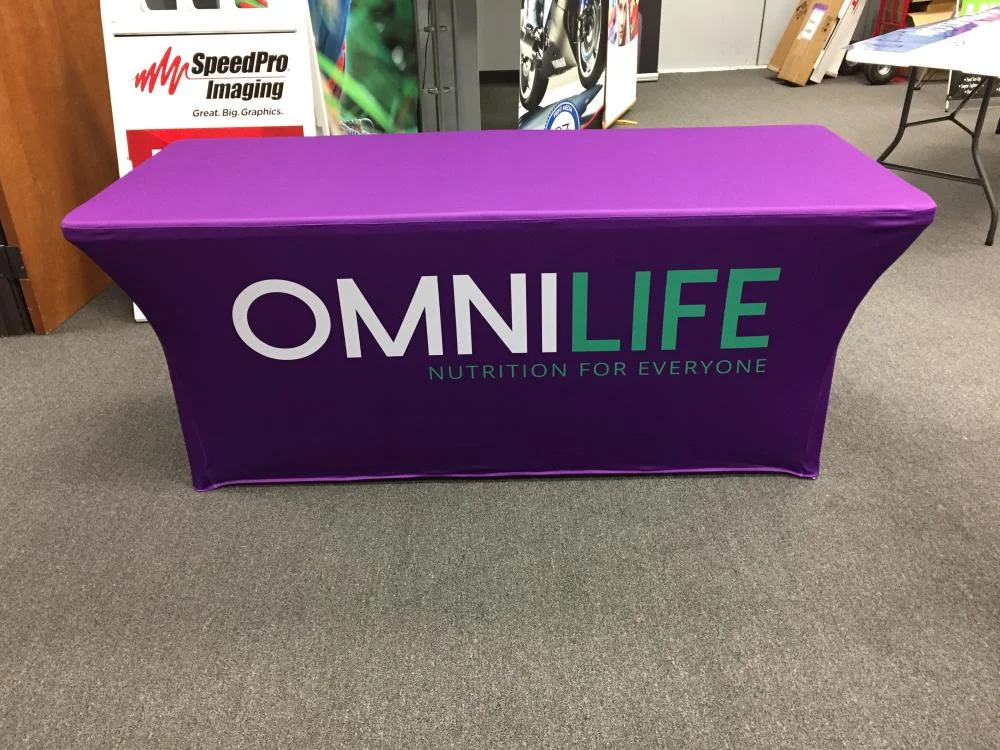
At a major San Diego trade show, a branded table cover seems like one of the simplest components in the booth. In practice, it sits at the intersection of venue safety, brand presentation, staff ergonomics, storage, color management, and production logistics.
That matters for exhibitors working at the San Diego Convention Center, Town and Country Resort, Marriott Marquis San Diego Marina, and other high-volume regional venues. A table treatment that looks excellent in a digital mockup can become a problem if the fabric lacks required documentation, the rear panel blocks staff access, the logo disappears behind chairs, or the printed corporate blue looks different from the backdrop ten feet away.
The solution is to specify table graphics as part of the complete exhibition system rather than ordering decorative fabric at the end.
Start With Venue Compliance, Not Artwork
Before choosing a fabric, confirm the rules for the specific event and venue.
Large trade shows commonly impose requirements governing decorative materials, booth construction, aisles, electrical equipment, hanging elements, fire safety, and installation. Individual show organizers can also establish requirements beyond a venue's general policies.
For fabric displays, NFPA 701 is an important reference. It establishes test methods for evaluating the propagation of flame in textiles and films used in applications such as curtains and other decorative materials.
The key distinction is important:
NFPA 701 is a test standard, not a generic label that can automatically be applied to every polyester fabric.
Exhibitors should confirm that the actual material being supplied has appropriate flame-performance documentation when required by the venue, show organizer, fire marshal, or authority having jurisdiction.
Fire-Compliance Documentation: What Exhibitors Should Verify
Exhibitor Tip
Store compliance documents digitally with the booth production files.
A searchable PDF available to the onsite marketing manager is much more useful than discovering that the only copy is in someone's office on event morning.
3-Sided vs. 4-Sided Covers: A Workflow Decision
Table-cover selection should begin with staff behavior.
A six-foot table used as a static product display has different requirements from one where employees sit for eight hours collecting leads.
3-Sided Open-Back Covers
A three-sided cover typically conceals the front and both ends while leaving the staff side open.
This configuration provides quick access to:
- Chairs
- Power supplies
- Literature
- Giveaways
- Bags
- Lead-capture equipment
- Frequently used inventory
For exhibitors whose employees sit behind the table, the open back also provides better legroom.
That makes three-sided covers particularly useful for recruiting booths, information desks, tabletop demonstrations, and smaller B2B exhibits.
The limitation is obvious: anyone viewing the table from behind can see the storage area.
4-Sided Table Covers
Four-sided covers conceal the entire table base.
That creates a cleaner 360-degree presentation and allows boxes and supplies to remain visually hidden beneath the table.
They work especially well for:
- Registration areas
- Sponsor tables
- Product displays
- Tables visible from multiple directions
- Gala or reception environments
- Booths where staff primarily stand
But complete coverage changes staff ergonomics.
If employees constantly need materials stored beneath the table, lifting or moving the rear drape dozens of times per day becomes irritating.
The visually cleaner option is not always the operationally smarter option.
Fitted Covers vs. Loose Throws
A traditional throw provides flexibility because one textile can accommodate a range of presentation styles.
Fitted covers create a more structured silhouette.
A fitted design can help:
- Maintain consistent panel alignment
- Reduce excess fabric
- Create a tailored corporate appearance
- Keep front-panel branding positioned predictably
For multi-location or multi-event programs, fitted covers can also help create consistency between booths.
The tradeoff is dimensional tolerance. A fitted cover designed around one table size should not be expected to fit a substantially different table correctly.
Confirm the venue-provided table dimensions before production.
Stretch Contour and Spandex-Style Covers
Stretch covers tension around the table and legs to create a sculpted contemporary appearance.
They are particularly effective for:
- Technology companies
- Product launches
- Modern corporate exhibits
- Experiential activations
- Minimalist booth designs
The tension changes artwork behavior.
Logos and typography can distort if they are placed without considering how the textile stretches across the finished structure.
Artwork should therefore be built from the manufacturer's production template rather than designed as a generic rectangle and forced onto the fabric afterward.
Comparing Table-Cover Formats
Professional Event table covers should therefore be specified around booth operations as much as visual branding. The best cover is the one that remains professional while allowing staff to perform their jobs efficiently.
Booth Ergonomics Directly Affect Brand Presentation
Exhibitors spend heavily on booth design and then sometimes force staff to work around badly planned furniture.
That affects the attendee experience.
Consider what happens when a representative must repeatedly:
- Bend down.
- Lift a full rear drape.
- Search through boxes.
- Hold the fabric aside.
- Retrieve a brochure.
- Reposition the cover.
Multiply that sequence across hundreds of conversations.
A better approach divides storage into two categories.
Active Storage
Items staff need repeatedly should remain easily accessible:
- Brochures
- Business cards
- Chargers
- Demonstration supplies
- Giveaways
- Lead forms
A three-sided configuration or purpose-designed access solution can work well here.
Reserve Storage
Backup inventory can remain concealed beneath a fully covered table or in approved booth storage.
This keeps the public-facing environment clean without making employees fight the display.
Design the Front Drop for Real Sightlines
The front panel is prime branding territory, but attendees do not view it in an empty design studio.
People stand directly in front of the table.
Bags lean against it.
Chairs may partially obstruct it.
The lower section can disappear in a crowded aisle.
For that reason, front-panel artwork should establish hierarchy:
Primary: Logo or company nameSecondary: Short positioning statementTertiary: URL or concise call to action
Do not place the only recognizable logo near the floor.
Do not fill the entire front drop with a service list.
The table cover should reinforce the booth's identity within seconds.
Dye Sublimation: Why It Works for Exhibition Fabrics
For compatible polyester textiles, dye-sublimation printing is particularly effective because the color is transferred into the fabric fibers through heat rather than forming a thick conventional surface coating.
That provides practical exhibition benefits:
- Vibrant full-color reproduction
- Good flexibility
- No brittle ink layer that readily cracks when folded
- Suitability for photography and gradients
- Reusability
- Washability when the specific fabric and care instructions permit it
This matters because exhibition textiles experience repeated packing, shipping, folding, installation, removal, and storage.
A trade show cover should be specified for its tenth deployment, not simply its first photograph.
Wrinkle Resistance Is a Material and Handling Issue
Polyester display fabrics can offer good wrinkle resistance, but "wrinkle-resistant" should not be confused with "impossible to wrinkle."
Poor storage can make any textile look unprofessional.
Event teams should:
- Clean covers according to manufacturer instructions
- Dry them completely before storage
- Avoid leaving them compressed for extended periods
- Pack fabric separately from dirty hardware
- Follow approved steaming or wrinkle-removal instructions
A premium printed cover arriving creased and crushed can undermine an otherwise expensive exhibit.
Artwork Preparation: Vector First
Table-cover artwork may appear simple, but production files still require disciplined prepress.
Use vector files whenever possible for:
- Logos
- Typography
- Icons
- Geometric brand elements
Vector graphics scale cleanly without pixelation.
Raster imagery should be evaluated at effective final resolution, not merely by the DPI number displayed in an image editor.
A 300-DPI photograph at 10 inches wide does not remain 300 DPI when enlarged dramatically.
Artwork Checklist
Before submitting files:
- Convert or package fonts appropriately.
- Supply vector logos where available.
- Confirm final table dimensions.
- Use the correct production template.
- Keep important content inside safe areas.
- Account for seams and panel transitions.
- Verify raster image quality at final scale.
- Identify approved corporate colors.
Pantone Color Is a Target, Not a Magic Button
B2B exhibitors often have strict brand standards.
A Pantone reference provides an important physical color target, but dye-sublimated fabric is normally produced through a process-color printing workflow.
Final appearance is influenced by:
- Textile whiteness
- Ink system
- Printer calibration
- ICC profile
- Heat-transfer conditions
- Venue lighting
- Surrounding colors
That becomes especially noticeable when a booth combines a fabric table cover with a vinyl banner, rigid sign, backlit display, and printed backdrop.
A disciplined color-management workflow seeks the closest controlled visual consistency across these different substrates.
For critical corporate colors, request a physical sample before approving the full production run.
Venue Lighting Can Change Perceived Color
Trade show lighting is rarely equivalent to the lighting used in an office when approving artwork.
Ballrooms and exhibition halls may use combinations of overhead lighting, daylight, booth lighting, LEDs, and digital displays.
A dark navy can appear nearly black under one condition and considerably lighter under another.
This is another reason physical proofing can be valuable for enterprise brands.
Color should be evaluated as something people will physically see, not simply as numbers in a design file.
Coordinate Table Graphics With the Entire Booth
The table should look like it belongs to the same company as the backdrop.
For a coordinated exhibit, establish consistent specifications across:
- Table covers
- Backdrops
- Retractable banners
- Sponsor graphics
- Directional signs
- Rigid panels
- Window or wall graphics
- Promotional displays
Companies sourcing professional signs in san diego for conferences can gain greater visual consistency when these components are managed through a unified production workflow rather than sent independently to unrelated suppliers.
The Miramar Production Advantage
SpeedPro of Greater San Diego operates from 8515 Arjons Dr, San Diego, CA 92126, in the Miramar area.
For exhibitors working at the San Diego Convention Center, Town and Country Resort, Marriott Marquis San Diego Marina, and other regional venues, local production reduces the physical distance between proof approval and the event.
That can be valuable when:
- A sponsor changes late.
- A graphic is damaged.
- Quantities increase.
- An additional directional sign is required.
- A file needs to be corrected.
- Event timing becomes compressed.
Local production does not eliminate production lead times. Fabric availability, finishing, quantity, artwork readiness, and current workload still matter.
But when the deadline is immovable, reducing shipping dependency can remove one major variable.
A Time-Saving Exhibitor Production Schedule
T-Minus 4 Weeks
- Review the exhibitor manual.
- Confirm fire-safety requirements.
- Verify table dimensions.
- Select cover configuration.
- Collect final brand assets.
- Identify Pantone targets.
T-Minus 3 Weeks
- Build artwork.
- Preflight logos and photography.
- Confirm fabric specifications.
- Request physical color samples if required.
- Submit compliance documentation where requested.
T-Minus 2 Weeks
- Approve final proof.
- Freeze artwork.
- Begin production.
- Coordinate related booth graphics.
- Confirm delivery requirements.
T-Minus 1 Week
- Inspect finished graphics.
- Verify quantities.
- Compare color across booth components.
- Confirm care instructions.
- Pack covers separately from hardware.
- Reconfirm venue access.
Event Day
- Install the cover before loading the tabletop.
- Check logo alignment from the aisle.
- Remove visible wrinkles using an approved method.
- Confirm rear access for staff.
- Hide reserve inventory.
- Photograph the finished booth for future reference.
Final Exhibitor Takeaways
A table cover should solve four problems simultaneously:
Compliance. Presentation. Ergonomics. Reusability.
Verify required flame-performance documentation before the event. Select three-sided or four-sided coverage according to how staff actually work. Use stretch covers when their contemporary appearance supports the brand, not simply because they look different. Specify washable, reusable polyester systems appropriate for professional dye-sublimation printing.
Then control the details that separate enterprise production from commodity printing: correct templates, vector artwork, effective image resolution, physical color proofing, consistent substrates, and disciplined finishing.
For exhibitors working across San Diego's major conference venues, those decisions create something more valuable than a decorated table.
They create a repeatable booth asset that can be packed, transported, installed, photographed, cleaned, and deployed again while maintaining the professional visual standards expected from a serious B2B brand.