 Sign up with Google
 Sign in with Zoho

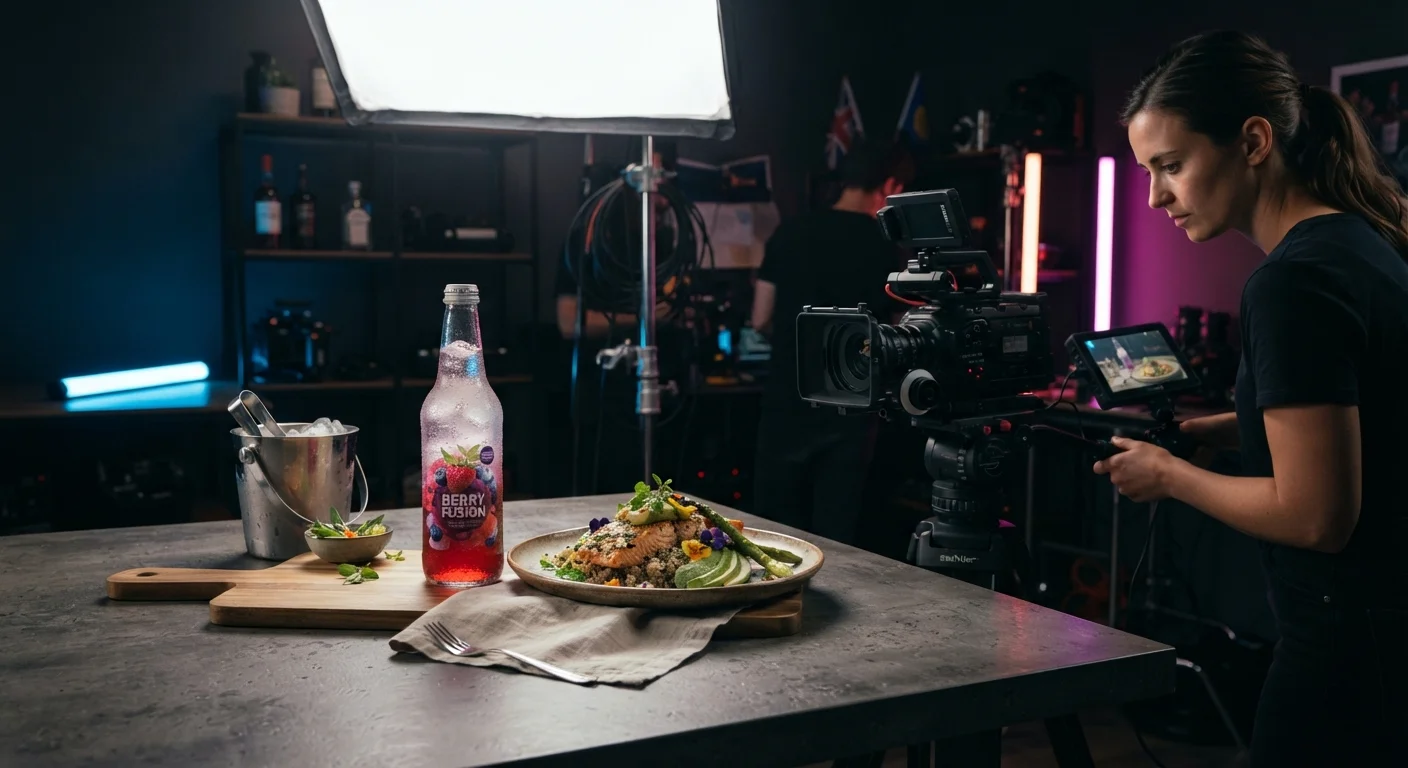
Food and beverage videos need a different lighting approach from general creator content. A colorful background may look attractive, but if the lighting makes fresh vegetables look dull, changes the color of a drink, or creates ugly reflections on a glass bottle, the video stops feeling appetizing.
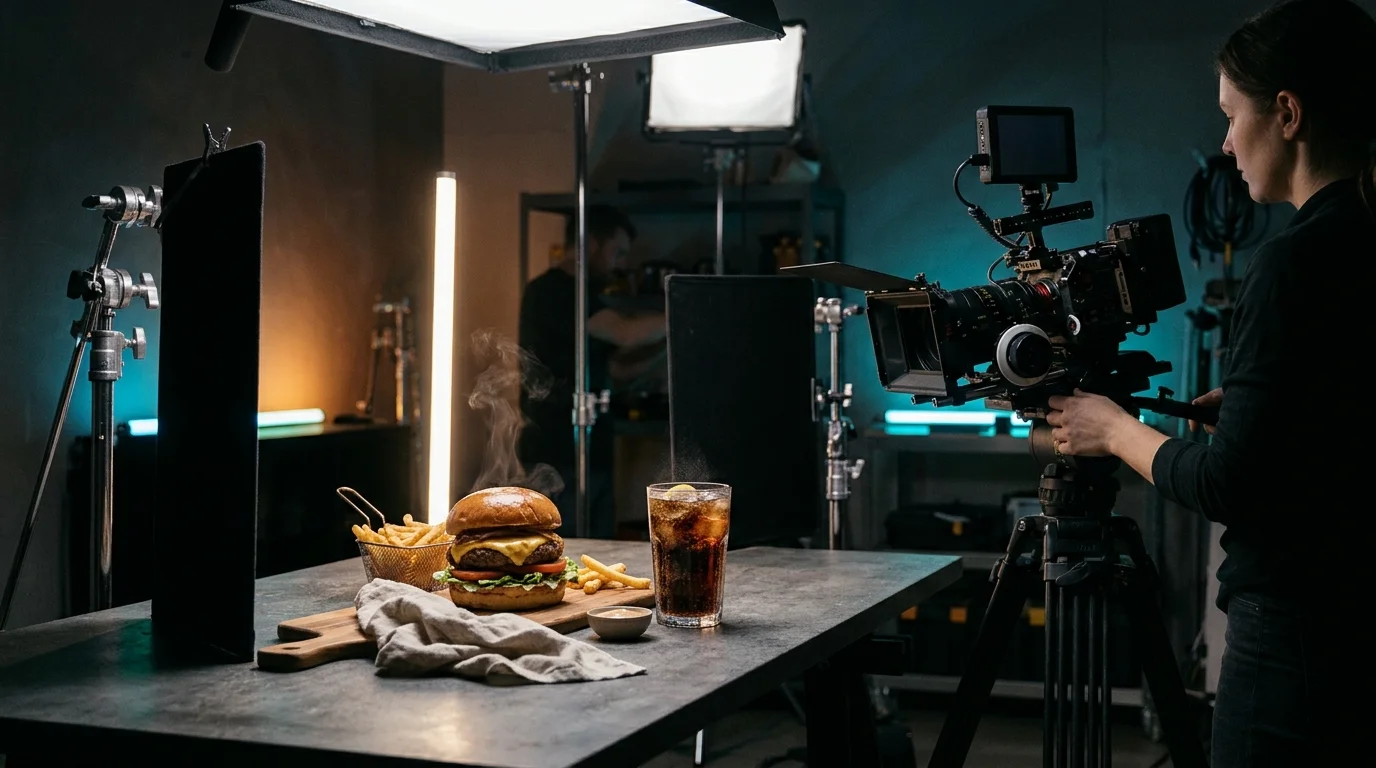
The best approach is usually to use rgb lights for controlled accents, edge separation, background color, and mood, while keeping the main light on the food or drink neutral and color-accurate.
For restaurants, ecommerce sellers, food brands, home creators, and product videographers in Pakistan, this combination can create premium visuals without requiring a large commercial studio.
The most important factors are not just brightness. Color accuracy, diffusion, flicker performance, dimming, mounting flexibility, white-light quality, and reflection control all matter.
Why RGB Lights Work Well for Food & Beverage Videos
RGB lighting gives you a level of creative control that ordinary white lights cannot.
You can use it to:
- Add brand colors to a background
- Create colored reflections on bottles
- Separate products from dark sets
- Add a cool or warm accent
- Highlight packaging
- Create cinematic table scenes
- Change mood without changing the physical set
Modern RGB fixtures can produce a wide range of hues and often include adjustable white-light modes as well. Adorama recommends pairing a neutral key light with RGB accent lighting when you want to preserve realistic subject detail while still adding creative color and depth.
That principle is especially useful with food.
The product should still look edible and believable.
Start with Accurate White Light on the Food
Before introducing any colored lighting, create a clean neutral base.
For food, the main light should reveal:
- Natural ingredient color
- Texture
- Moisture
- Steam
- Sauce detail
- Packaging
- Garnish
- Surface shine
B&H recommends larger, softer light sources for food photography because a larger apparent source creates softer light, while placing the light relatively close increases useful output. Continuous LED fixtures also make sense for creators who shoot both stills and video.
A simple base setup might use:
Key light: large soft neutral source from the side or slightly behindFill: reflector or softer second lightRGB: background or edge accent
This gives you attractive shape without allowing saturated colors to dominate the food itself.
Color Accuracy Matters More for Food Than Many Creators Realize
Imagine filming:
- Red strawberries
- Green herbs
- Golden fried food
- Brown coffee
- Orange juice
- Chocolate
- Fresh meat
- Colorful packaging
If the main light has poor color rendering, those colors may look unnatural.
B&H recommends paying attention to CRI and TLCI when choosing LED fixtures. Higher values generally make it easier to reproduce colors accurately for human viewers and cameras.
For food and beverage work, prioritize RGB lights that also provide a good-quality white-light mode.
Useful features include:
- High CRI/TLCI
- Adjustable CCT
- Smooth dimming
- Full hue control
- Flicker-resistant video output
- Repeatable settings
RGB capability is valuable, but poor white-light quality can limit the fixture's usefulness in commercial food production.
Best Setup 1: Neutral Key + RGB Background
This is one of the safest and most versatile setups.
Place:
Neutral key light: side-front or side-back of foodRGB light: aimed at backgroundReflector: opposite the key light
The neutral light makes the food look accurate.
The RGB fixture creates atmosphere behind it.
For example:
Blue Background
Works well with:
- Cold drinks
- Water bottles
- Energy drinks
- Technology-oriented food brands
Warm Orange Background
Works well with:
- Coffee
- Tea
- Baked products
- Restaurant dishes
- Desserts
Purple or Magenta
Useful for:
- Confectionery
- Premium drinks
- Creative product ads
- Social media campaigns
The background should support the product rather than overpower it.
Best Setup 2: Two RGB Lights for Beverage Bottles
Beverage products are particularly suitable for controlled RGB accents because glass and plastic bottles can reflect colored light beautifully.
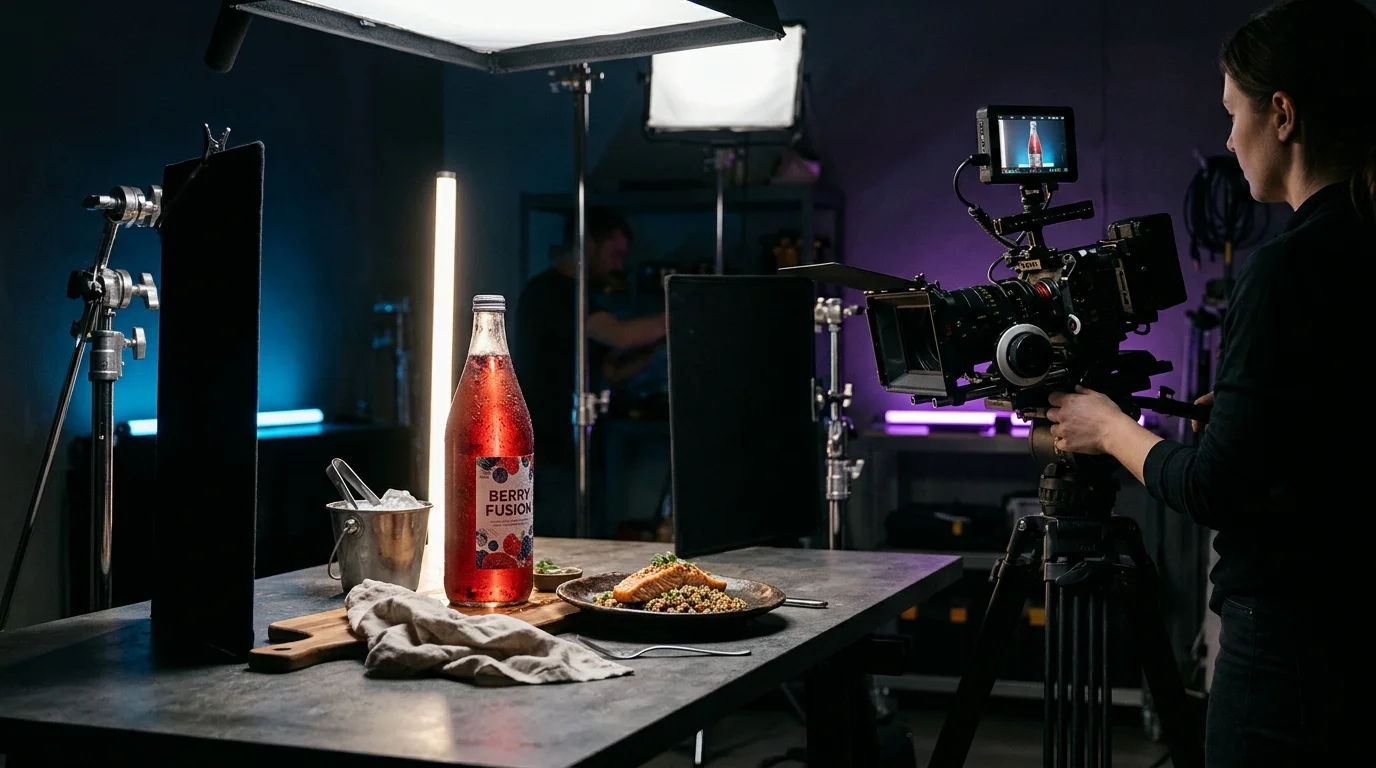
Try:
- Blue RGB behind-left
- Purple RGB behind-right
- Neutral key light in front
This creates colored edges while keeping the label readable.
For clear bottles, placing an RGB source behind the product can also illuminate the liquid or create a glowing outline.
But reflection control matters.
Adorama's reflective-product guidance recommends broad, diffused sources and deliberate positioning for glass, polished metal, glossy plastic, and packaged products because direct uncovered light can create distracting hotspots.
This is especially important for:
- Soft drink bottles
- Juice bottles
- Perfume-style beverage packaging
- Cans
- Coffee cups
- Glass tumblers
Reflective Bottles Need Larger Light Sources
A small hard light can create a bright dot or ugly rectangular reflection on glass.
A larger diffused source creates smoother highlights.
Useful tools include:
- Softboxes
- Diffusion fabric
- Scrims
- Strip lights
- White reflector cards
- Black flags
Adorama specifically notes that large diffused sources help produce controlled gradient reflections on glass and glossy products rather than harsh hotspots.
For bottles, a long narrow source can be particularly effective because it produces a clean vertical reflection that defines the shape.
Use RGB to Enhance Cold Drinks
Cold drink advertising often uses cooler colors.
Blue and cyan can visually reinforce:
- Freshness
- Ice
- Cold temperature
- Water
- Energy drink aesthetics
But keep the front of the drink accurately exposed.
A blue light should usually hit:
- The background
- The side of the bottle
- The ice
- The edge of the glass
rather than covering the entire label.
That way the product remains recognizable.
Warm RGB Accents Work Better for Some Foods
Not every product benefits from blue or purple.
Warm tones often suit:
- Burgers
- Grilled meat
- Fried food
- Bread
- Cakes
- Coffee
- Tea
- Desserts
Try subtle:
- Amber
- Orange
- Warm red
behind or around the food.
The main key light should still stay neutral enough to preserve real food color.
You can also use warm practical lights in the background while keeping RGB as a secondary accent.
RGB Panels vs Tubes vs Pocket Lights
Different fixture types suit different food-video workflows.
RGB Panels
Panels provide broad coverage.
Useful for:
- Background washes
- Larger tables
- Restaurant dishes
- Wide product scenes
RGB Tube Lights
Tube lights work well for:
- Bottle reflections
- Edge lighting
- Visible background accents
- Long highlights
Pocket RGB Lights
Compact fixtures are useful for:
- Small tabletop shoots
- Drinks
- Packaged snacks
- Dessert close-ups
- Hidden background accents
Current RGB listings show that modern compact fixtures can offer full hue control, adjustable CCT, dimming, battery power, and app control in very small bodies, making them practical for tabletop work.
Dimming Control Is More Important Than Maximum Power
Food scenes often happen at close distances.
You may place an RGB light:
- Behind a bottle
- Under a table edge
- Close to the background
- Beside a plate
At these distances, too much output becomes difficult to control.
Fine dimming allows you to create a subtle accent rather than a saturated color patch.
This is one reason adjustable RGB fixtures are useful for small studios.
For creators still deciding between different lighting categories, Hope Enterprises' guide to studio lights in Pakistan: COB vs RGB vs softbox explains how these light types serve different roles in a studio.
Avoid Changing the Actual Food Color
Creative color is useful, but food still needs to look appetizing.
Avoid allowing strong green, blue, or magenta light to cover foods where viewers expect natural color.
For example:
- Bread should still look golden.
- Tomatoes should still look red.
- Herbs should remain green.
- Fried food should not appear gray or blue.
- Meat should not look unnaturally colored.
Use RGB primarily on:
- Background
- Packaging edge
- Table surface
- Steam
- Props
- Backdrop
rather than the main food surface.
Lighting Steam and Smoke in Food Videos
Steam becomes visible when it is lit from behind or from the side-back.
For hot:
- Coffee
- Tea
- Soup
- Fresh food
- Grilled dishes
place a controlled light behind the steam path.
A neutral or slightly warm backlight can make steam stand out naturally.
RGB can be added to the background, but strongly colored steam may look artificial unless the campaign intentionally calls for a stylized effect.
A three-point lighting concept—key, fill, and backlight—is widely used in video because the backlight helps separate the subject and create depth.
The same principle can be adapted for tabletop food scenes.
Lighting Ice, Condensation and Liquid Texture
Cold beverage videos often rely on:
- Condensation
- Ice cubes
- Splash
- Glass highlights
- Bubbles
Side or backlighting can reveal these details better than flat front lighting.
Try placing a neutral light behind the glass and then use a subtle RGB background accent.
This can create:
- Sparkle in ice
- Defined bottle edges
- Brighter bubbles
- Visible condensation
Avoid placing several direct lights in front of the bottle because the surface may become filled with unwanted reflections.
Creating a Premium Dark-Background Food Video
Dark sets work particularly well for:
- Coffee
- Chocolate
- Premium drinks
- Luxury packaging
- Grilled food
- Restaurant advertising
Try:
Neutral key: large soft source from side-backRGB 1: blue or purple background lightRGB 2: warm accent on opposite sideBlack flags: control spill
Keep parts of the frame dark.
Premium product lighting does not require every area to be visible.
Controlled shadows can add shape and contrast.
Hope's guide to photo studio lights for content creators can help with understanding key, fill, and background-light roles when building this kind of setup.
Lighting Bright, Fresh Food Content
For:
- Salads
- Fruits
- Breakfast content
- Juice
- Baking
- Recipe videos
use a brighter overall setup.
A soft neutral key can simulate window light.
Then use RGB only as a small:
- Background glow
- Shelf accent
- Brand-color element
This style usually benefits from restrained RGB.
The food itself should remain the brightest and most attractive part of the image.
Frame Rate and Flicker Matter for Video
A light that looks fine to your eyes can still flicker on camera.
This becomes more noticeable at:
- Higher frame rates
- Slow-motion shooting
- Certain shutter speeds
- Low dimming levels
If you shoot:
- Pouring shots
- Splash videos
- Slow-motion food preparation
test the RGB light at the actual frame rate and shutter speed you plan to use.
Adorama's RGB-light guidance specifically recommends camera testing when evaluating color performance and flicker at the intended frame rate and shutter speed.
Do this before a commercial shoot.
Use Slow Motion Carefully with RGB Lighting
Food and beverage product videos often include:
- Sauce pouring
- Drink pouring
- Ice drops
- Powder falling
- Splash shots
- Steam
- Syrup movement
Slow motion may require more light because higher frame rates generally need faster shutter speeds.
In those situations, a small RGB pocket light may not provide enough illumination as the main source.
Use the RGB fixture as an accent and rely on a stronger neutral light for exposure.
Keep Packaging and Labels Readable
Food and beverage videos are often commercial.
Branding matters.
Do not allow creative lighting to obscure:
- Product name
- Logo
- Flavor
- Label color
- Ingredients
- Packaging details
If the RGB reflection crosses the label, reposition the light or use a black flag.
Your creative lighting should support the product, not hide its identity.
App Control Can Save Time
Small product sets can become crowded.
If your RGB light is hidden:
- Behind a bottle
- Behind a table
- Close to a background
- Inside a small set
physically reaching it can disturb the composition.
App or remote control allows you to adjust:
- Hue
- Brightness
- Saturation
- White balance mode
without moving the fixture.
Modern RGB fixtures commonly offer onboard, wireless, or app-based control for exactly this kind of flexible workflow.
Best RGB Light Features for Food & Beverage Videos
Prioritize:
High Color Accuracy
Important for believable food and packaging color.
Adjustable White Light
Useful when the same fixture needs to provide neutral illumination.
Full Hue and Saturation Control
Allows precise brand-color matching.
Fine Dimming
Essential for close tabletop setups.
Flicker-Free Performance
Important for video and slow motion.
Good Mounting Options
Helps position lights behind products or around a table.
Battery Power
Useful for restaurants and location shoots.
App or Remote Control
Makes small product setups easier to manage.
Compact Size
Small fixtures are easier to hide around bottles and plates.
Common Mistakes to Avoid
Using RGB as the Only Light
Food may lose accurate color.
Making the Scene Too Saturated
Strong color can make food appear artificial.
Pointing Bare Lights at Glass Bottles
This creates distracting hotspots.
Ignoring Flicker
Always test lights at your intended video settings.
Using Too Many Colors
One or two accents are usually enough.
Hiding the Product Label
Colored reflections should not obscure branding.
Forgetting Diffusion
Soft light usually makes food and beverage products more appealing.
Lighting the Background Brighter Than the Product
The viewer should notice the food first.
Simple Three-Light Setup for Beginners
A strong starting setup is:
Light 1 — Neutral Key
Large and soft, placed side-front or side-back.
Purpose:
- Show food texture
- Preserve real color
- Create appetizing highlights
Light 2 — RGB Accent
Place behind-left.
Purpose:
- Background color
- Product separation
Light 3 — RGB or Neutral Edge Light
Place behind-right.
Purpose:
- Bottle edge
- Steam
- Packaging separation
Start with low RGB intensity.
Increase it only until the color becomes clearly visible.
Final Thoughts
The best RGB lights for food and beverage product videos are not necessarily the most powerful ones.
They are the lights that give you precise control.
Food should remain believable, appetizing, and accurately colored. Bottles should show smooth reflections instead of harsh glare. Labels should remain readable. Steam, condensation, glass, and packaging should have enough separation to feel dimensional.
For most creators, the strongest workflow is:
soft neutral key light + controlled RGB accent lights + careful reflection management
Use panels when you need wider coverage, tube lights when you want long reflections, and compact RGB lights when you need small accents around tabletop products.
If you control color, diffusion, brightness, reflections, and flicker carefully, even a compact home or ecommerce studio can produce polished food and beverage videos suitable for social media, product pages, restaurant campaigns, and paid advertising.
FAQs
Are RGB lights good for food product videos?
Yes. RGB lights are especially useful for backgrounds, edge lighting, packaging accents, and brand colors. A neutral light should normally remain the main source on the food so its color stays believable.
What color RGB light is best for beverage videos?
Blue and cyan work well for many cold beverages, while purple, magenta, amber, and other colors can be chosen according to the product and brand identity. The product itself should still remain accurately lit.
How do I light a glass bottle without glare?
Use large diffused sources, change the angle of the light, and use flags or reflector cards to shape the reflection. Broad sources usually produce cleaner highlights than small bare lights.
Do RGB lights need high CRI for food videos?
Good color rendering is important if the RGB fixture will also be used in white-light mode. High CRI/TLCI helps reproduce food, packaging, and other colors more accurately on camera.
Are RGB lights suitable for slow-motion food videos?
Yes as accent lights, but test them for flicker at your chosen frame rate and shutter speed. Slow-motion shooting may also require a stronger neutral key light because higher frame rates often need more light.