When you see an outdoor walkway that looks disjointed, wavy, or full of awkward, forced angles, it is usually because the setup crew tried to eyeball the bends on the fly. Guessing the angle or over-bending stiff lumber guarantees ending up with buckling borders, sloppy lines, and a completed walkway that ruins the property’s curb appeal.
That’s why getting a smooth, natural bend that stays structurally secure during the pour requires one to master the exact steps of setting up concrete pathway forming.
Key Takeaways
● The Radius Rule: Using a center-stake compass system to lock in fluid, identical curves.
● Flexible Materials: Choosing thin plywood or specialized composite boards over stiff lumber.
● Bracing Framework: Doubling your support stakes through the apex of the bend to prevent blowout.
● Consistent Widths: Using a custom gauge block to keep the parallel forms perfectly spaced.
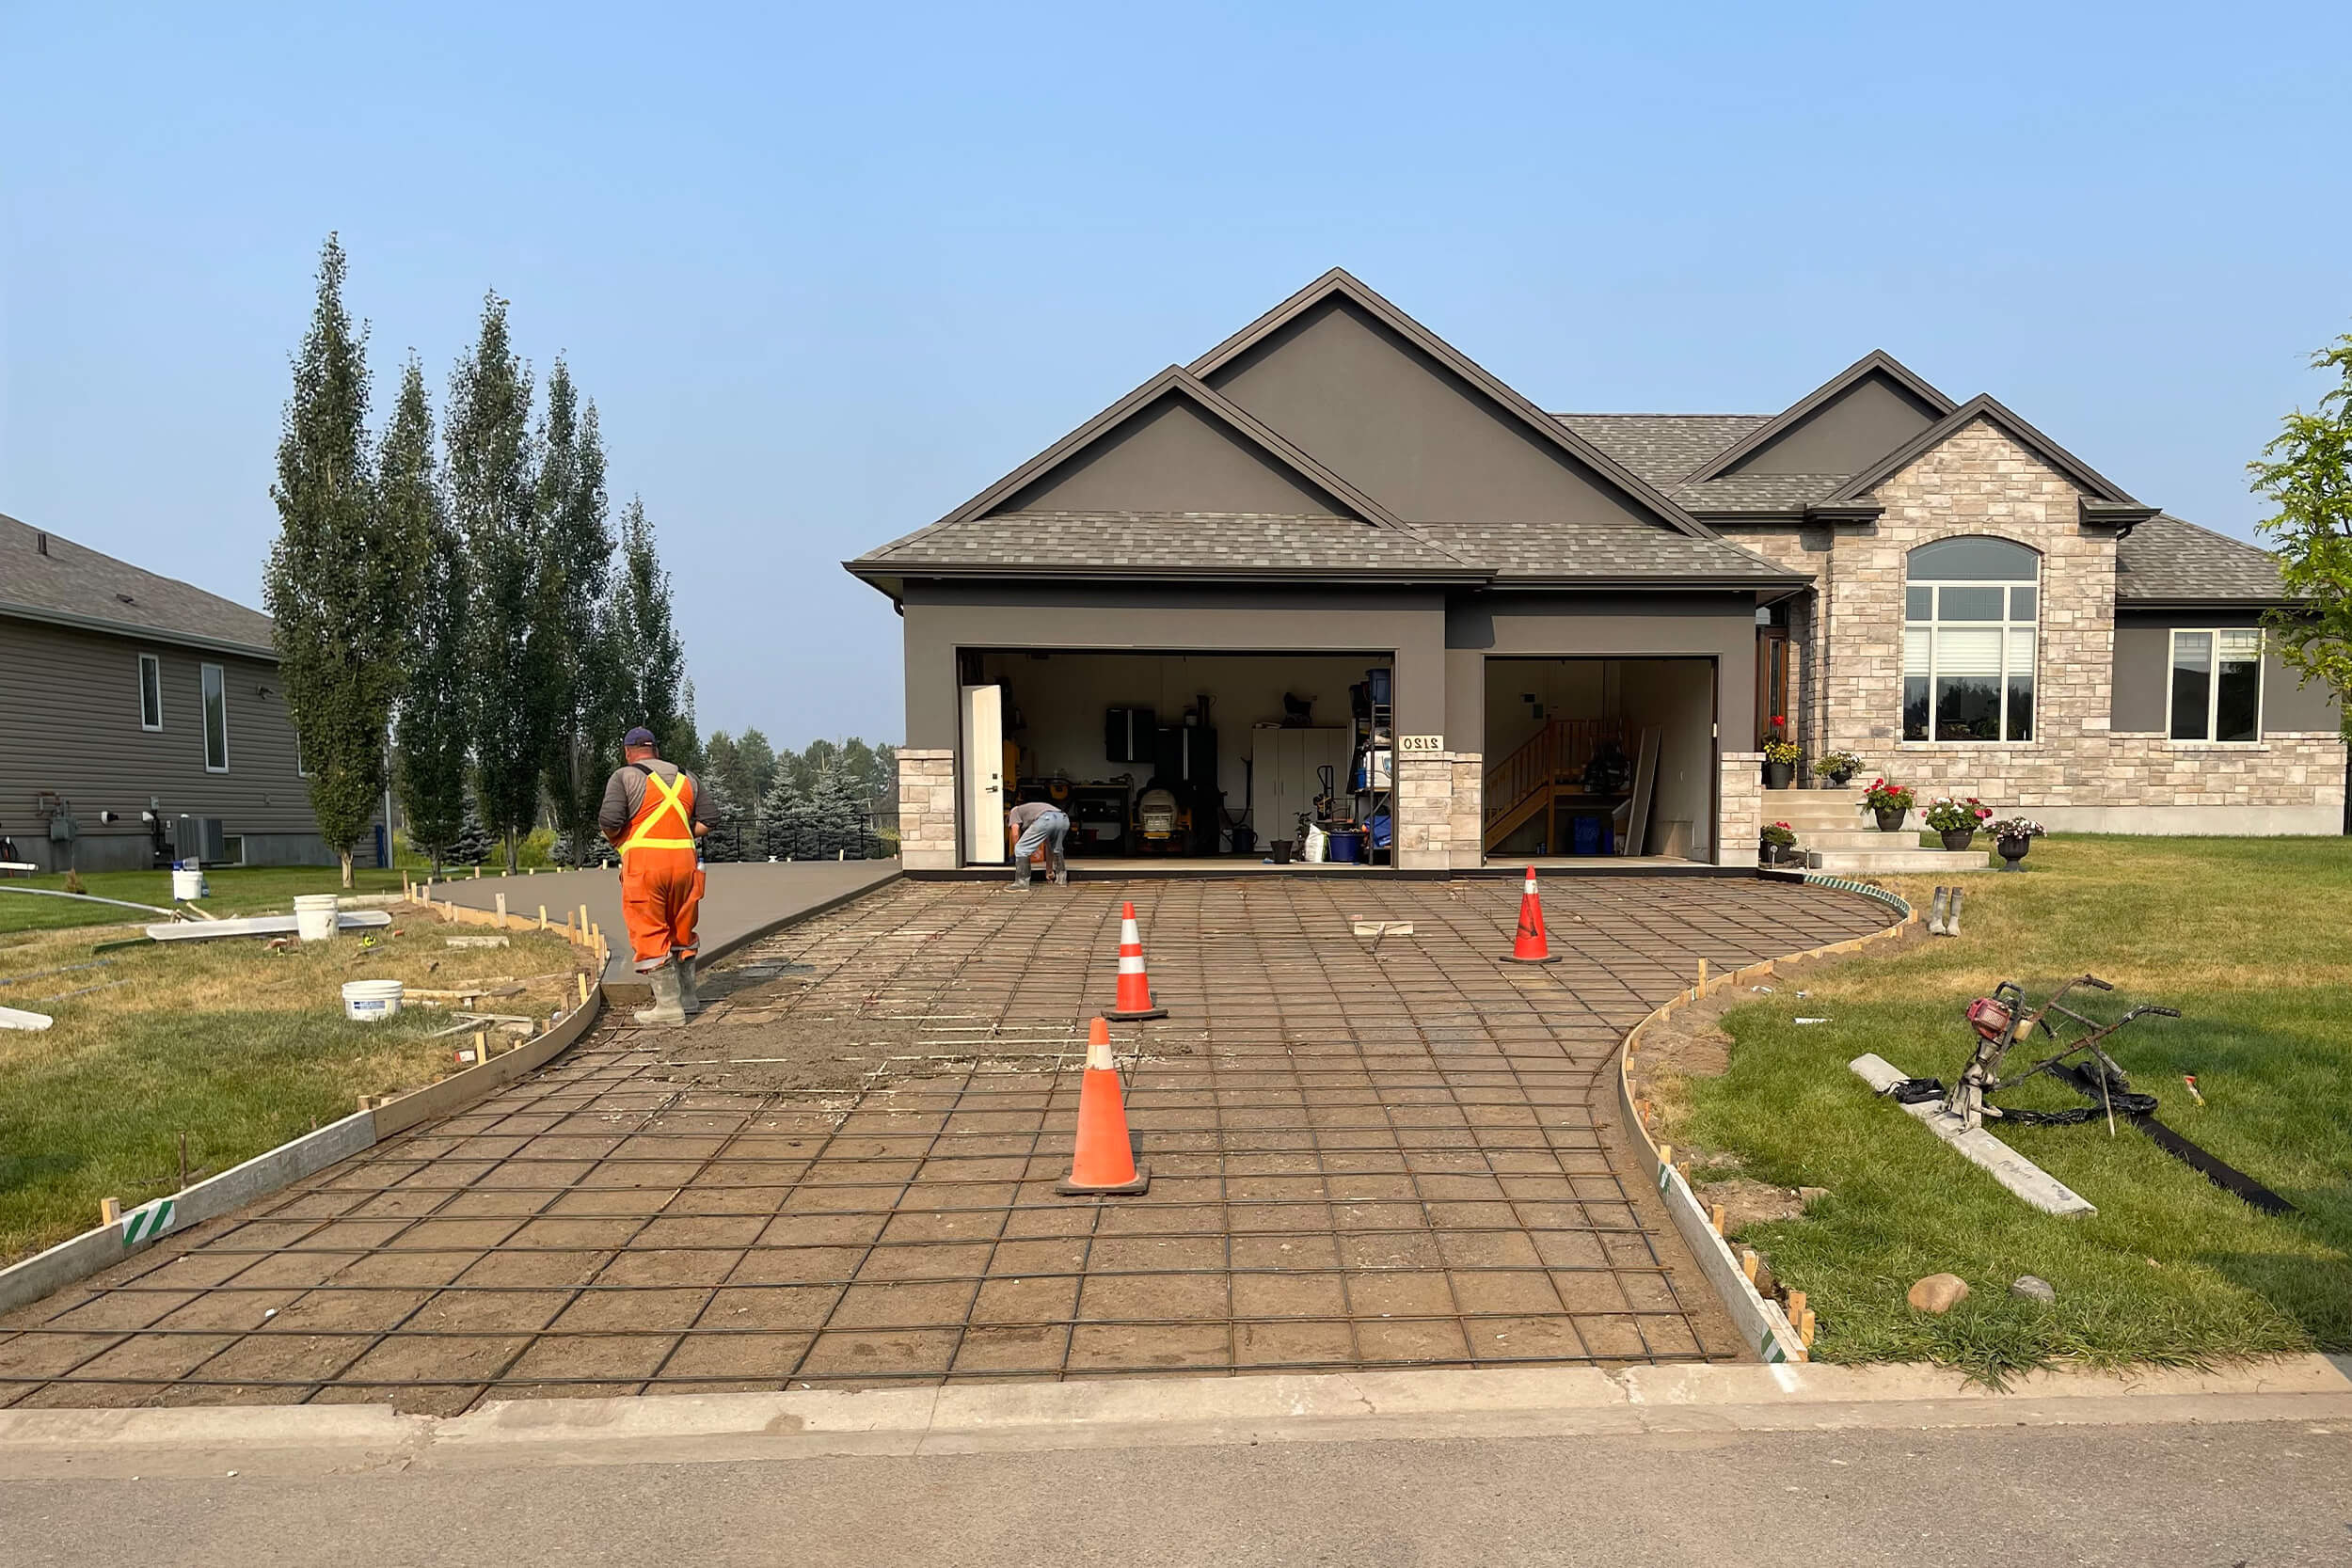
How To Map Out Curves for Concrete Pathway Forming Layouts?
● Use a Center-Stake Pivot Method
The secret to a flawless curve is finding its true geometric center point before driving a single form stake into the mud.
Professional installers drop a temporary stake at the focal point of the arc, tie a tape measure or non-stretch string line to it, and swing it like a giant compass to trace a perfect line across the dirt.
By doing this, the curve remains totally uniform all the way through the turn and doesn't flatten out or tighten up halfway through. Relying on a fixed center-point sweep is the only way to avoid wavy, uneven borders when finishing up concrete pathway forming.
● Swap Stiff Construction Lumber
Standard two-by-four framing lumber is great for straight runs, but forcing it to bend will either snap the wood or create choppy, faceted angles instead of a smooth sweep.
Experienced crews switch to flexible quarter-inch Masonite, specialized plastic forms, or laminated plywood for the curved sections of the run.
The soft, flexible materials are easy to bend without cracking, leading to a perfectly smooth, unbroken wall guiding the liquid mixture smoothly. Selecting high-flex forming materials is a critical step for achieving premium results when it comes to concrete pathway forming.
● Double the Support Stakes
Wet concrete is incredibly heavy and exerts an immense amount of outward hydraulic pressure as it drops from the chute, pushing most firmly right against the center of a curve.
If the stakes are spaced too far apart, the wet weight will bow the flexible wood outward, destroy the clean lines and result in an unsightly bulge.
To sidestep such high-pressure blowouts, space the heavy wood or steel stakes just twelve inches apart through the tightest part of the bend. Beefing up the structural bracing at the apex keeps the shape perfectly locked down during concrete pathway forming.
● Run a Parallel Width Gauge Block
Once the inside curve is completely anchored and braced, setting up the matching outside wall requires 100%-dimensional precision.
If you try to ballpark the distance, the path will pinch and widen as it turns, which looks incredibly sloppy and creates weak structural zones in the slab.
Cut a simple wooden spacer block to the exact required walkway width and use it to gauge the gap between the forms every single foot along the sweep. Keeping the two lines perfectly parallel guarantees a flawless visual profile.
Conclusion
Leaving the layout to a crew that takes shortcuts or tries to eyeball the bends leads to warped pathways, snapped forms, and uneven slab widths that completely ruin the property's overall aesthetic.
That’s why property owners who want to install perfect architectural walkways can be sure that the job will be done right the very first time around by relying on certified experts, such as the likes of “SMD Concrete Forming".
Plus, working with a well-established team that understands both complex commercial and residential concrete pours ensures that the outdoor paths will remain structurally sound, level, and stunning for years down the road.


.webp)